

How To Create A Contents Page In Word
How to Create a Contents Page in Word
This Contents Page in Word tutorial is suitable for users of Word 2010, 2013, 2016, 2019, and Word for Microsoft 365.
Objective
Create a Table of Contents for a Word document and update it to add new entries.
Table of Contents Explained
A Table of Contents page makes it easier for your readers to navigate and work with long documents. It gives documents a professional look and feel and helps you jump to a specific section quickly and easily.
A Table of Contents is usually inserted at the beginning of a document or just after a cover page. It can be modified to fit the overall style of the document and be updated easily with one click when new headings and paragraphs are added to the document.
The golden rule, when creating a contents page, is good preparation.
A Table of Contents relies on the document being formatted with heading styles in order to work correctly. Word scans the document and looks for anything marked with a heading style and pulls it through into the contents page. You can choose how many heading levels you would like to include.
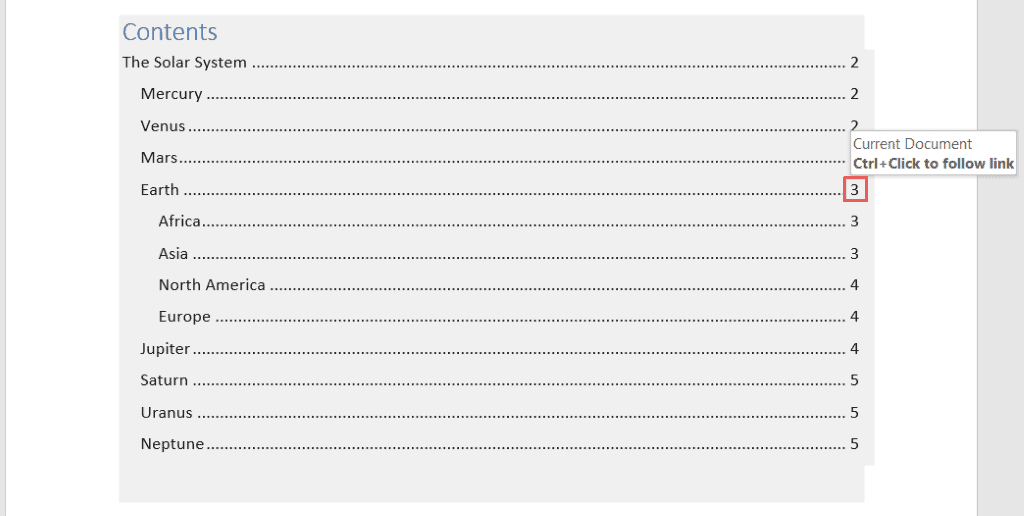
In this screenshot, I have pulled through 3 levels of heading.
Method
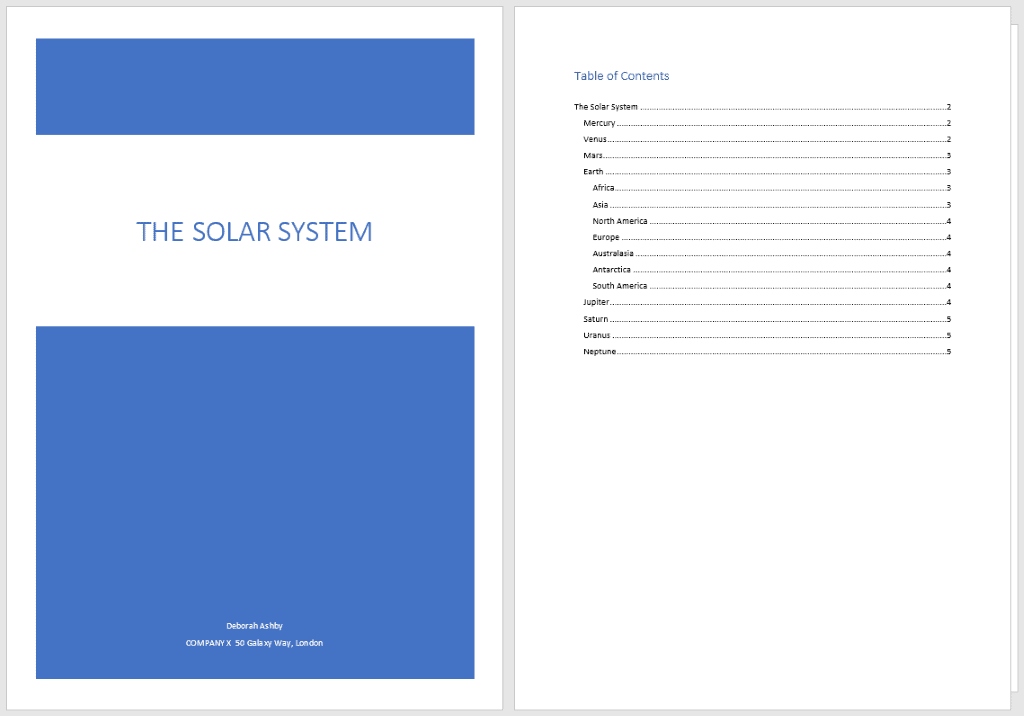
In this example, I am going to go through the process of creating, modifying, and updating a Table of Contents in Word for a document titled 'The Solar System'.
Prepare the Word document
In order to successfully insert a Table of Contents page, you must first set-up the document correctly by using Word styles to denote headings.
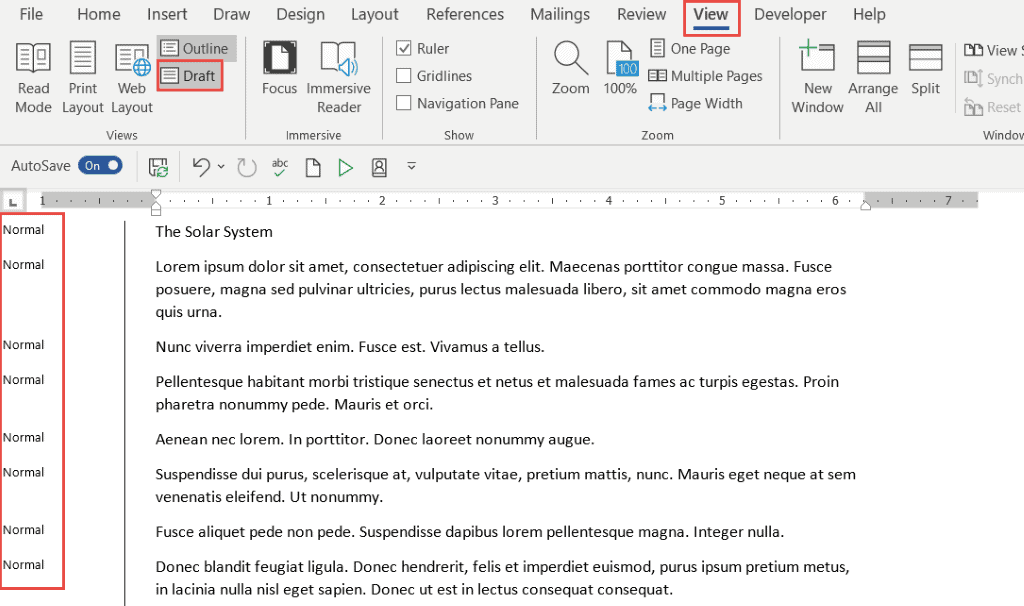
Switching to Draft View
You may find it easier to view your document in draft mode when working with styles, as it makes it easy to see which headings you've applied to which items.
- Click theView tab
- ClickDraft
The style currently applied to each paragraph will display on the left-hand side of the document. Normal denotes no style has been applied.
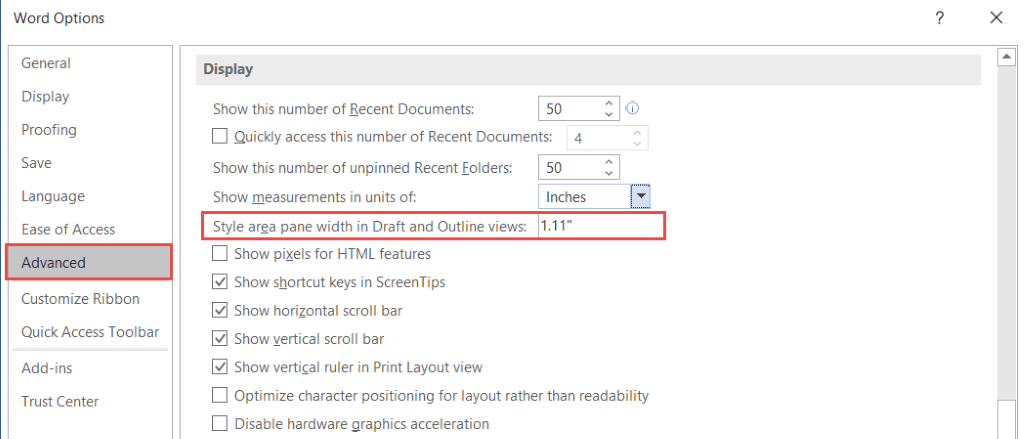
NOTE: When you switch to Draft view, if you do not see the style pane on the left-hand side, you will need to go into Word Options and turn it on.
- Click theFile tab
- ClickOptions
- Click theAdvanced tab
- Scroll down theDisplay section
If you cannot see the styles pane, it will say 0 inches. Set this to 1 – 2 inches and clickOK.
Apply heading styles to the document
- Select the first main heading in your document
- Click theHome tab
- In theStyles group, clickHeading 1
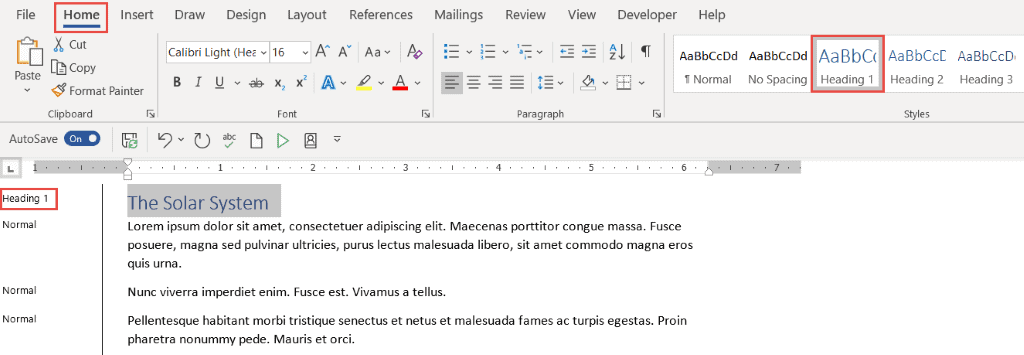
Scroll through the document and apply a Heading 1 style to all top-level headings
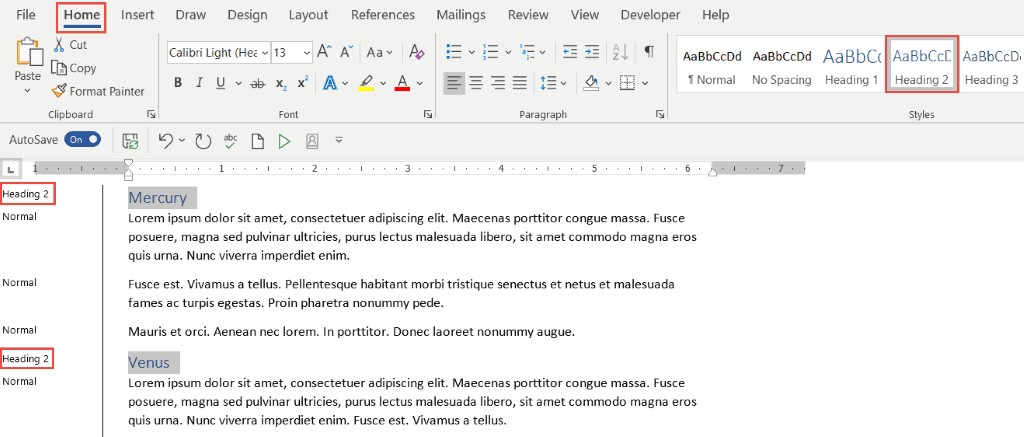
- Select the second-level headings in your document
- In theStyles group, clickHeading 2
Apply a Heading 2 to all second-level headings in the document. You can hold down theCTRL key to select multiple headings at the same time.
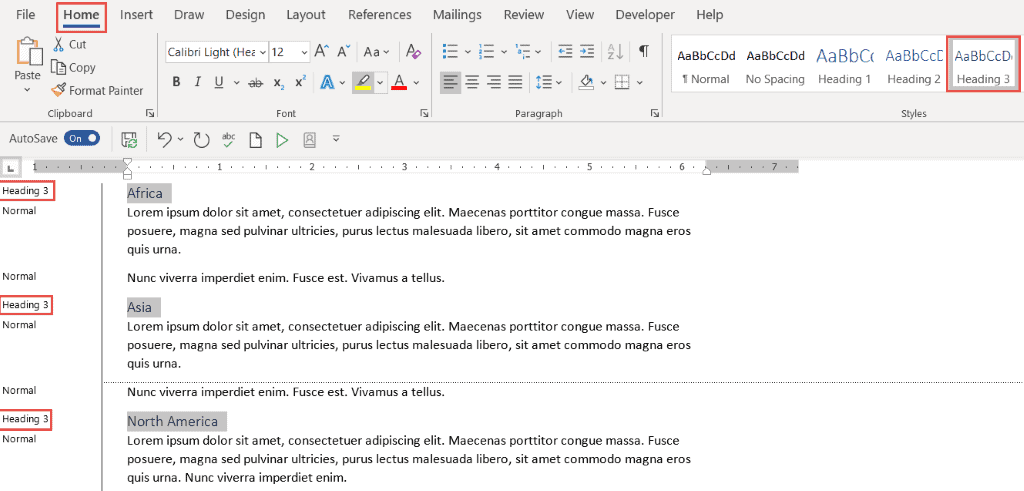
Repeat this process for any other headings in the document. In this example, I have three levels of heading in my document.
Once the document is styled and organized correctly, it becomes easy to insert a Table of Contents.
Insert the Contents Page
A contents page is normally inserted at the beginning of the document.
- Scroll to the top of the document and position the cursor before the first letter of the first word in the document
- PressCTRL+Enter to insert a page break
- Click theReferences tab
- ClickTable of Contents
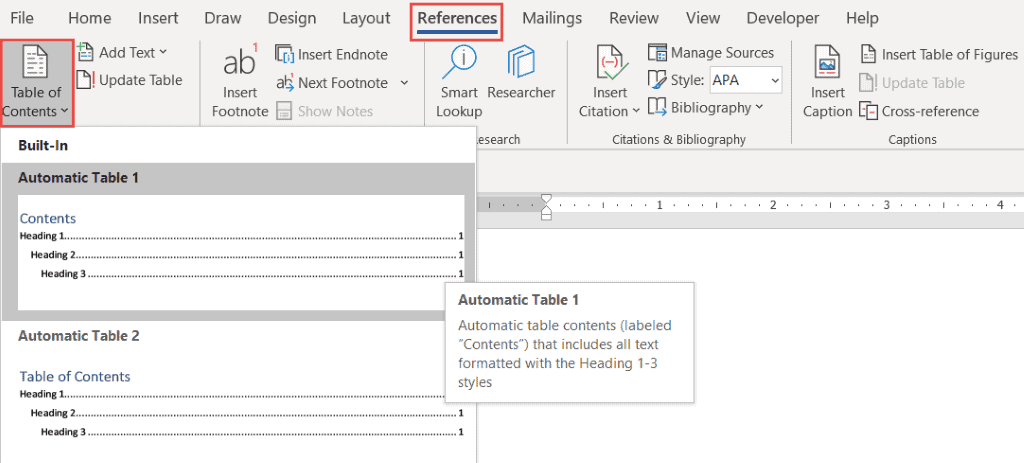
Word makes it simple to quickly add a Table of Contents by providing a small selection of in-built tables. In this example, I have selectedAutomatic Table 1.
Hold down theCTRL key and click on a page number to jump to that page.
Modify a Table of Contents
You can make changes to the Table of Contents and format it as you please.
- Click on the Table of Contents to select it
- Click on theReferences tab
- ClickTable of Contents
- ClickCustom Table of Contents
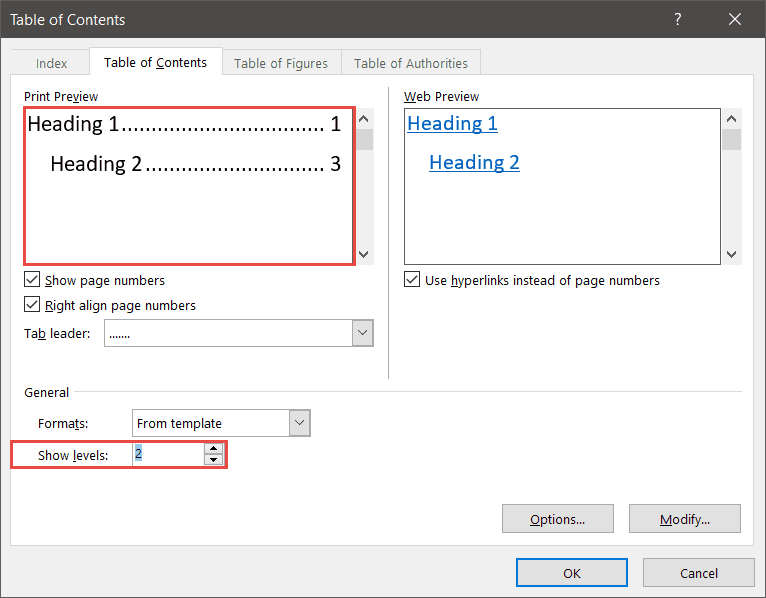
Tab leaders and levels
Tab leaders
Tab leaders are the dots you see between the heading and the page number in the Table of Contents. You can change these to solid lines or dashes.
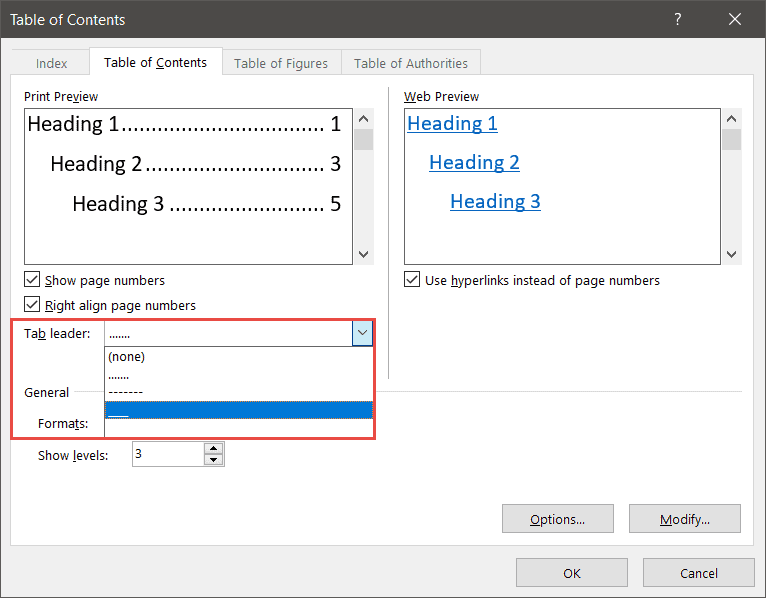
Show levels
You can also specify how many levels of heading you want to show in the Table of Contents. For example, you might have four levels of heading in the document, but you only want to show two levels in the Table of Contents.
- ClickOK
If you make a change to the Table of Contents, Word will ask if you would like to replace the current Table of Contents.
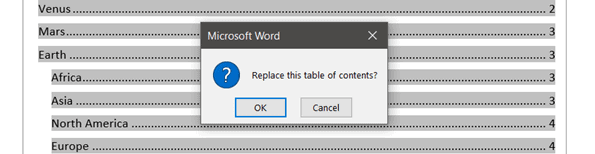
- ClickOK to replace
Updating a Table of Contents
It's rare for a document to stay the same forever. New paragraphs might be added either at the end of the document or somewhere within it. With each new addition, headings are pushed on to new pages, and the new items need to be added to the Table of Contents.
Fortunately, it's very easy to update a Table of Contents in Word.
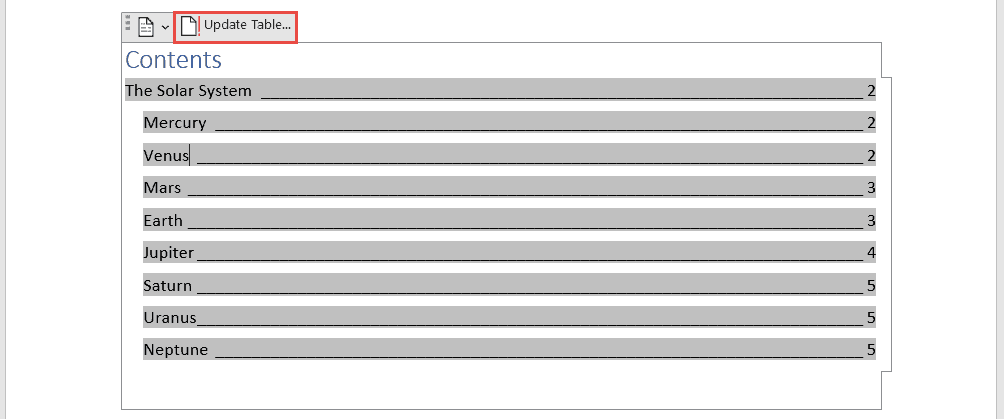
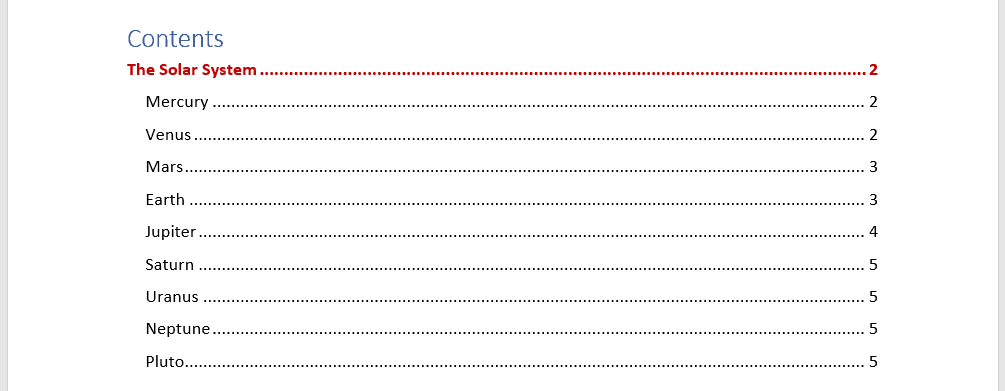
In this example, I've added a paragraph for'Pluto' at the end of the document. I've formatted it with a heading 2 style.

I now need to update my Table of Contents to include the additional heading.
- Click on the Table of Contents to select it
- Click theUpdate Table button
Word will ask if you want to update the pages numbers only or the entire table.
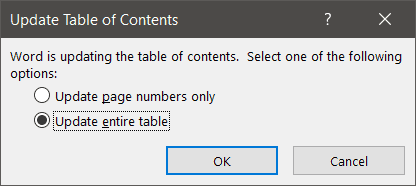
If you have reorganized your document and moved headings on to different pages but not added any new headings, you could select 'Update page numbers only.' For everything else, select'Update entire table.'
Custom Table of Contents
You can customize the look and feel of your Table of Contents by modifying the formatting. For example, you might decide that you want all level 2 headings to display in a bold, red font.
- Click on the Table of Contents to select it
- Click on theReferences tab
- ClickTable of Contents
- ClickCustom Table of Contents
- ClickModify
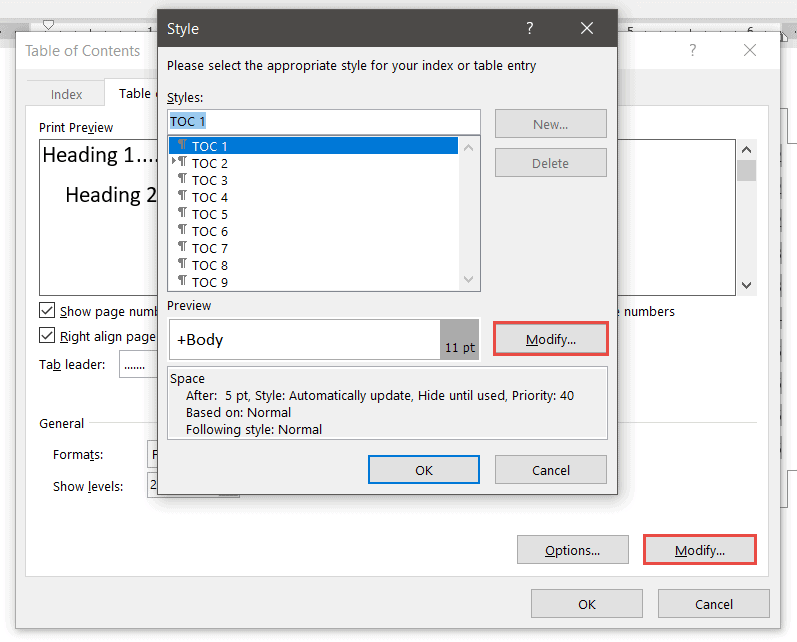
Modifying'TOC 1' will affect all level 1 headings. Modifying'TOC 2' will affect all level 2 headings and so on.
- SelectTOC 1
- ClickModify
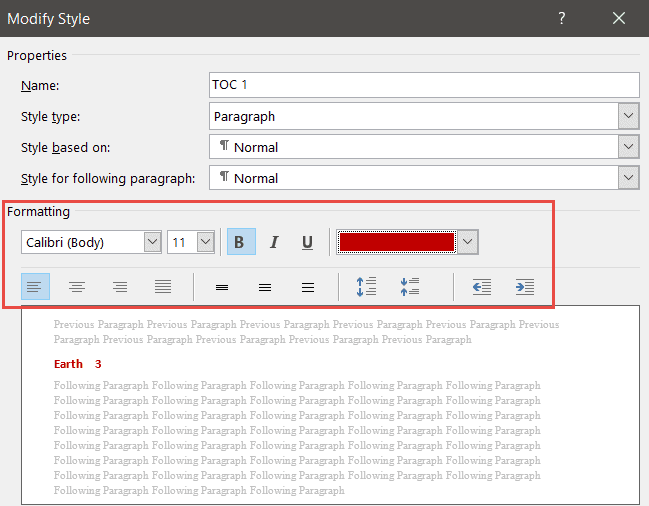
- Make the desired formatting changes
- ClickOK
Video Tutorial
To see a demo of how to create a Contents Page in Word, please watch the following video tutorial.
How to create a Contents Page in Word Video (15:09)
For more Free Microsoft Office tutorials from Simon Sez IT. Take a look at our MS Office Resource Center.
To learn Word with Simon Sez IT. Take a look at the Word courses we have available.
Deborah Ashby

Deborah Ashby is a TAP Accredited IT Trainer, specializing in the design, delivery, and facilitation of Microsoft courses both online and in the classroom. She has over 11 years of IT Training Experience and 24 years in the IT Industry. To date, she's trained over 10,000 people in the UK and overseas at companies such as HMRC, the Metropolitan Police, Parliament, SKY, Microsoft, Kew Gardens, Norton Rose Fulbright LLP. She's a qualified MOS Master for 2010, 2013, and 2016 editions of Microsoft Office and is COLF and TAP Accredited and a member of The British Learning Institute.
How To Create A Contents Page In Word
Source: https://www.simonsezit.com/article/how-to-create-a-contents-page-in-word/
Posted by: kennedyuted1981.blogspot.com
0 Response to "How To Create A Contents Page In Word"
Post a Comment